A guide by Ockert le Roux
The Ghost Mushroom’s soft glow appears after dark.
Although clearly visible to the naked eye, the best results visual representation of the mushroom is obtained by photographing it.
A camera can detect light much fainter light than the human eye can and it is therefore ideal to photograph this species.
Plan ahead
It is best to visit the colony during the day and clearly mark the position where they occur. The forest at night looks very different and one can easily get lost.
I had a few mates that searched for hours, going home without success. ForestrySA has kindly sign posted and mapped the location of a colony on Kangaroo Flat Road, so hopefully we will all find the colony without too much difficulty!
The mushroom is easy to identify during daylight hours. It has a big white funnel or trumpet shape, clustering together in stacks on dead pine stumps. As the mushroom grows older, the upper part turns brown or even sometimes black. Optimum glow appears a few days after the mushroom has emerged and when their appearance is still white.
Any modern DSLR camera is suitable for this purpose. The secret to successful photography is good planning. Understand your camera and its settings. To fiddle in the dark with settings, or trying to locate mushrooms is counter productive and you will become frustrated.
What to bring
As the forest floor is damp this time of year, take a plastic ground sail with you, as you will have to lie or sit down to focus and compose. Also make sure that you are dressed properly to protect against cold and rain. A handheld torch is a must to help navigate the forest at night and to assist with focus.
As you are going to do long exposure of up to 30 seconds, it is imperative that you use a tripod or other device to steady your camera.
As the mushroom grows on stump level close to the ground, a tripod is not always effective for lower close up shots. I prefer a simple bean or sand bag, which I place on the ground and then steady my camera on top of it. As the angle is quite low, composition is difficult and you may have to use your “life-view” mode to obtain a proper composition.
Lens selection and aperture
Lens choice is important. Use your lens with the lowest aperture or f-stop, as you want to maximise light intake. Set your aperture to its lowest setting, which ranges from 1.4 to 5.6 on most lenses.
If you want to get a wider perspective use focal lengths of smaller than 20mm. For close-ups, macro lenses, or other lenses with a focal length between 35-105mm works well.
Also be aware of the minimum distance at which your lens will focus for close-up shots. If your lens has a stabiliser or anti-shake devise, please make sure it is in the OFF position before you take the photograph.
Anti-shake causes shake when the camera is mounted on a tripod!
Focus
Once you have your camera set up on the tripod or sandbag, it is important to focus on the mushroom using your torch light to light it up and obtain sharp focus. Once focus is obtained, switch your lens to the manual focus mode or it will continuously try to focus in the dark in the absence of a reference point.
ISO
Our next setting is our ISO. Again we want to maximise light intake and therefore we want to use a setting that will maximise the sensitivity of our camera sensor.
A range between 1,000 and 3,000 works best for most cameras. If you push your ISO too high, it will result in a grainy picture, which is not ideal. ISO range is camera specific, so experiment with a few ISO settings on your camera and see what happens.
Shutter speed
Our next setting is shutter speed. Once again, we want to maximise light intake and therefore a shutter speed of greater than 20 seconds is ideal.
Most cameras go up to 30 second exposure settings and others have a “BULB” mode where you can choose any exposure length you would like.
I have brought the mushrooms into a studio environment where I staged them against a black backdrop, using up to 4-minute exposure times at a higher f-stop of 5.6 and lower ISO range to obtain better depth of field and a clearer, crisper image.
That said, I strongly discourage people to pick the mushrooms and take them home. They are quite poisonous and should not be handled. We also want to leave them behind for others to photograph and enjoy in the natural forest environment.
Use a remote shutter or self-timer
If you have an electronic device to trip your camera shutter, please use it to obtain sharper images.
If not, most cameras have a self-timer, which releases the shutter automatically at time intervals, such as 2 or 10 seconds after pressing the shutter button, which will give the same result.
Most electronic shutter release devices also allow you to use the “BULB” mode. When performing a long exposure, make sure your car and torch lights are OFF.
Respect your fellow photographers
Please be respectful of other photographers working in the area. Many times we switch our torch on to focus, while our mate next door is busy with an exposure – doing this will ruin his / her image.
Conclusion
Please experiment with the three main settings, Aperture, ISO and shutter speed to see what works best for your camera. The images at the bottom of this page will provide you with an idea of the settings and focal lengths I used.
When you’re out in the forest, stick to the demarcated areas, as we don’t want people to get lost in the forest at night. Also don’t remove or touch the mushrooms and take any litter and other items with you when you go home.
Good luck and enjoy your outing to witness what must be one of Australia’s most remarkable and earliest life forms!
Photographs
- Image 1: The Nikon D3S camera provides a crisp clear images with good depth of field. This shot was staged in studio environment against black back drop. F-8, ISO 1,250, 113 seconds.
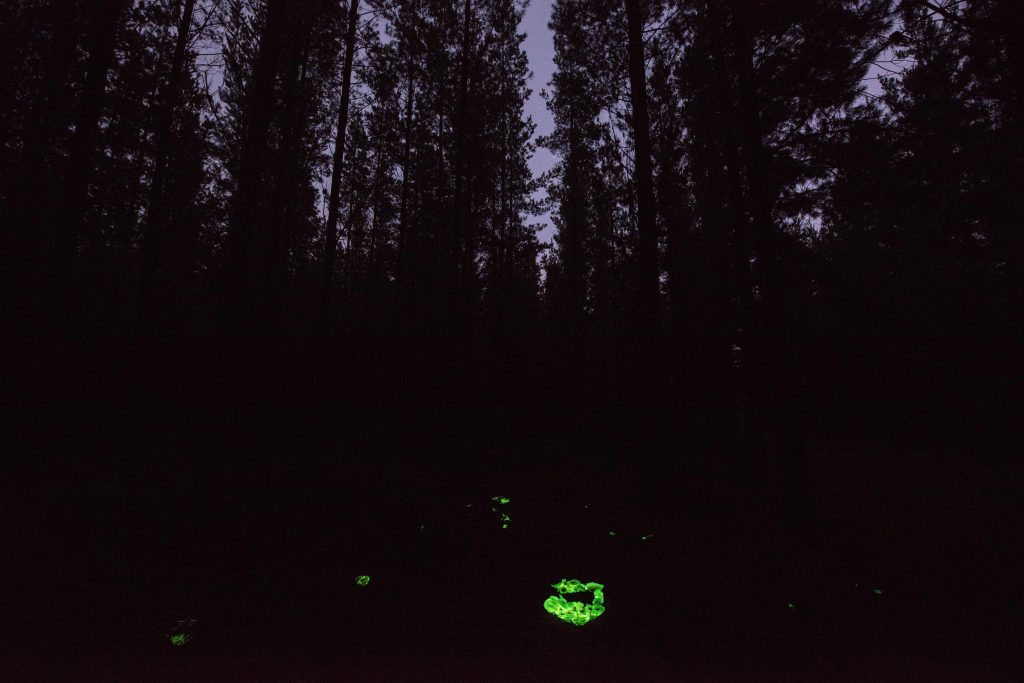
- Image 2: A wide angle lenses gives more perspective to surrounding forest environment. Nikon D800, 14mm lens f 4.5, ISO 2,000 at 35 second exposure.
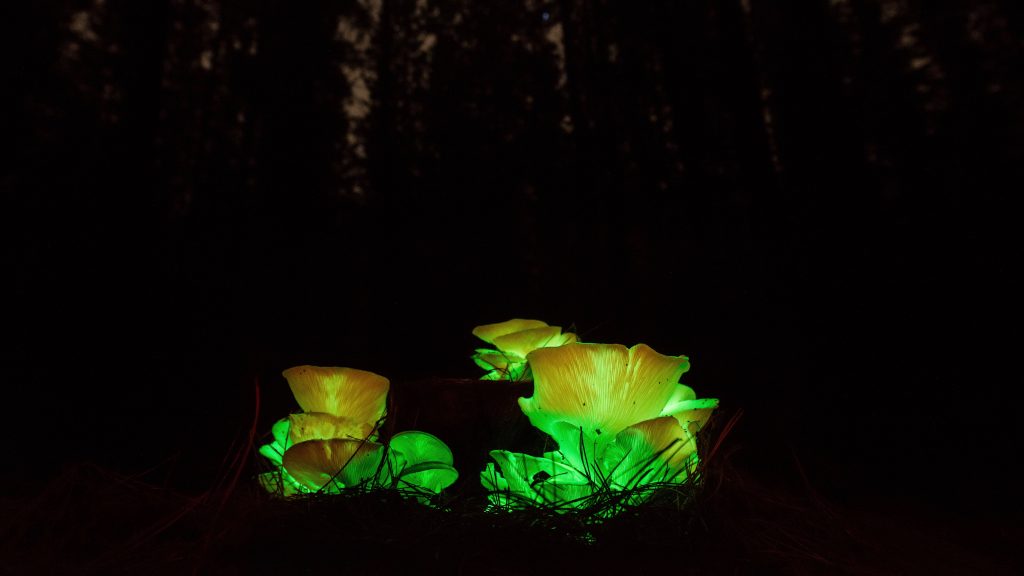
- Image 3: This image was captured with a Nikon D800, set at f 4.5, ISO 3,200, and 37 second exposure.